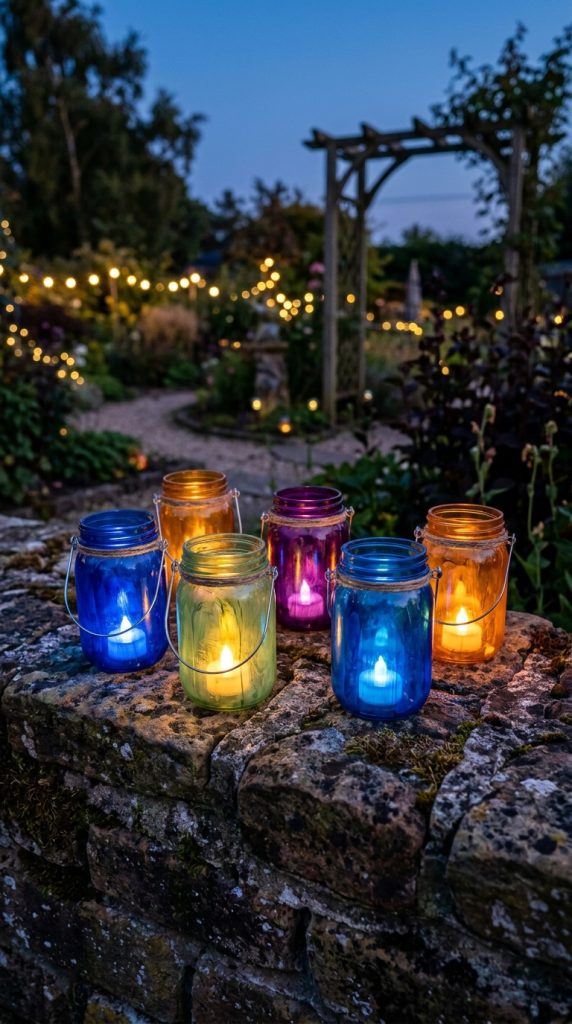
9. Mason Jar Painted Lanterns
The Vibe: Colorful, artisanal, playful, and the mason jar project that most directly showcases personal creativity.
Mason jar painted lanterns take the basic glowing mason jar concept and add a layer of creative artistry — using glass paint, Mod Podge tinted with food coloring, tissue paper decoupage, or frosted spray paint to create jars that glow in different colors and patterns when a candle or fairy light is placed inside. The painted surface transforms the simple jar into a stained-glass effect lantern that casts colored light and shadows across the surrounding space.
What You Will Need:
- Wide-mouth mason jars in any size
- Glass paint in transparent or translucent finish (not opaque paint — the light needs to shine through)
- Paintbrushes in various sizes for different detail levels
- Mod Podge and food coloring as an alternative to dedicated glass paint
- Tissue paper in various colors for a decoupage approach
- Tea light candles, battery-operated tea lights, or small fairy light strands for inside the jars
- Painter’s tape for creating geometric patterns or clean lines
How to Create Them:
For the painted approach: clean the outside of the mason jar thoroughly and allow to dry completely. Apply transparent glass paint in the desired colors and patterns using a paintbrush. Simple approaches include washing a single color across the entire jar, creating vertical stripe patterns using painter’s tape, or painting simple botanical shapes — leaves, flowers, or geometric patterns. Allow to dry completely between coats and allow to cure for at least 24 hours before placing a candle inside.
For the tissue paper decoupage approach: cut or tear colored tissue paper into small pieces. Apply a layer of Mod Podge to a section of the jar exterior. Press tissue paper pieces onto the wet Mod Podge, overlapping them for a stained glass effect. Apply another layer of Mod Podge over the top. Allow to dry completely before lighting.
Pro Tips:
- Transparent glass paint allows the most beautiful light transmission — opaque paint blocks the light and defeats the purpose of the glowing lantern effect
- Mixing two or three translucent colors on the same jar — like blue and green, or yellow and orange — creates a stained glass effect that is far more beautiful than a single flat color
- The tissue paper decoupage technique requires less precision than painting and often produces more beautiful, organic results — the overlapping tissue paper creates natural color variation and depth
- Battery-operated tea lights are safer and more practical than real candles for painted mason jar lanterns, especially if children are present in the backyard
- For an instant effect with minimal craft skill required, Rust-Oleum’s frosted glass spray paint in colors creates a beautiful, professional-looking painted lantern in minutes
Materials Cost: Approximately $15–$25 for a set of six painted lanterns including paint, jars, and candles.
Variations: Create a set of ombre lanterns — multiple jars painted in graduating shades of the same color for a cohesive, artistic display. Paint galaxy-effect jars using sponging technique with multiple dark colors and silver paint. Create seasonal lanterns — autumn orange and red, winter blue and silver.
Best Placement: Arranged as a centerpiece on an outdoor dining table, clustered along a fence top, placed in a group on a garden wall, or positioned in a fire-safe location around an outdoor seating area.